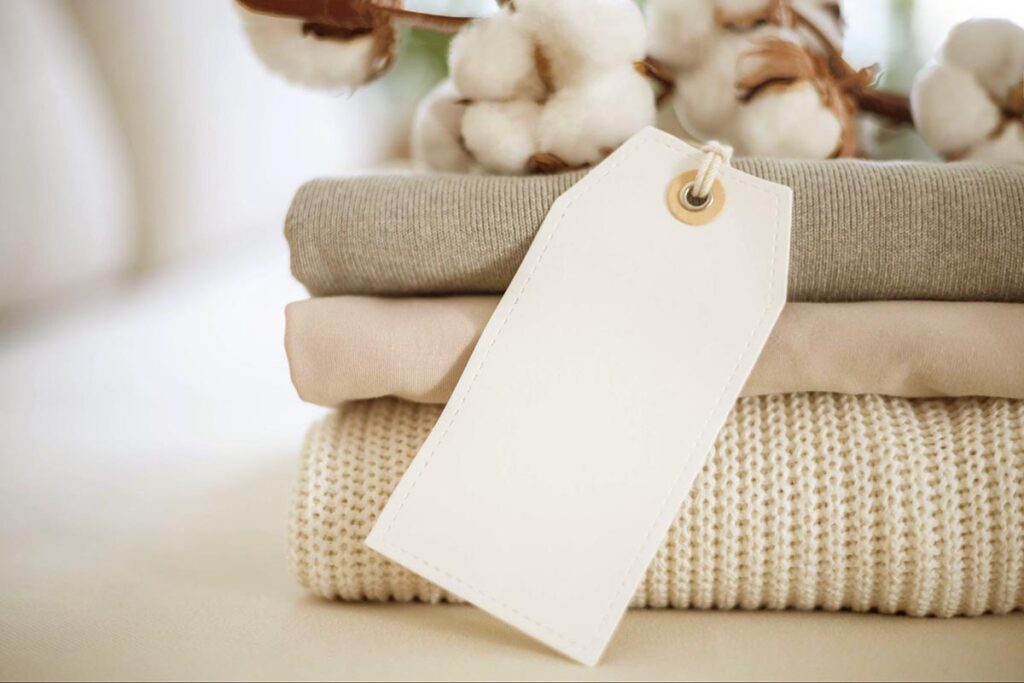
How to Organize a Newborn Dresser: An Expert’s Guide
Focus on creating a system that’s both functional and easy to maintain while organizing a newborn dresser. Also, categorize the items into type, size, and season.
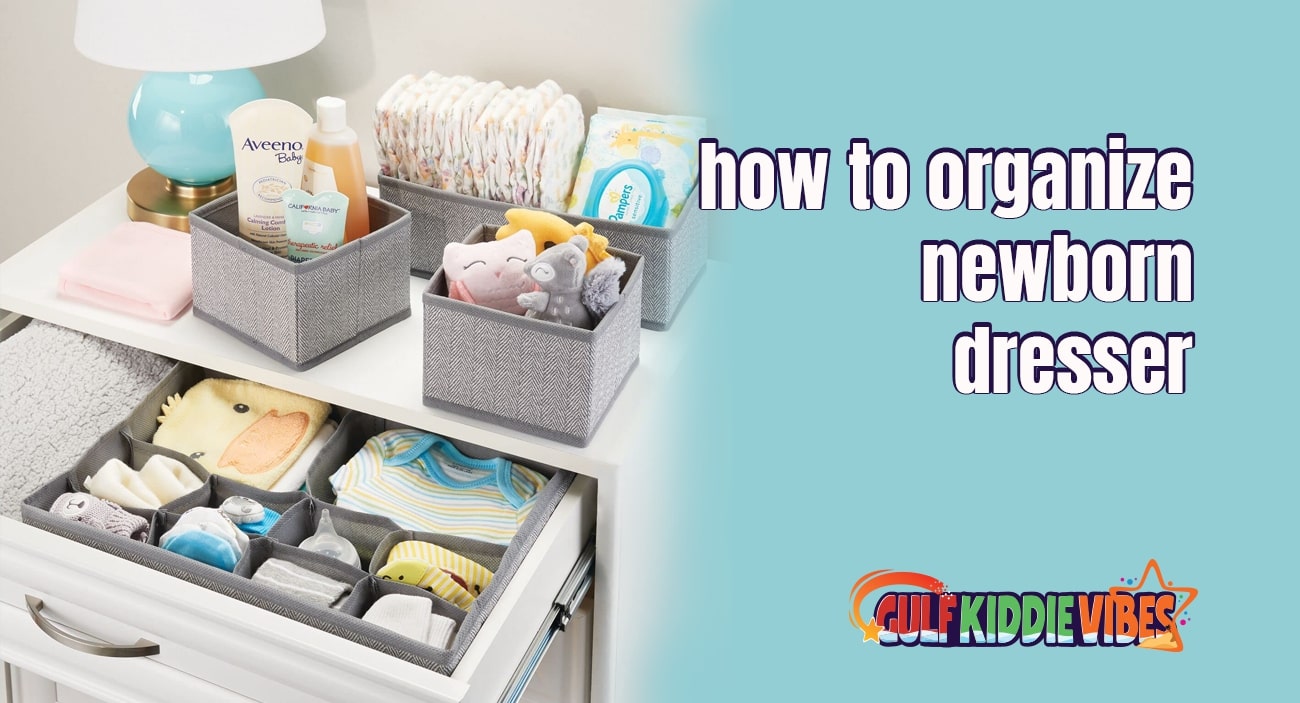
Start by dividing the dresser into categories. You can categorize it into baby clothes, extra diapers, and burp cloths. Also, use expandable drawer dividers to keep tiny clothes neat and within easy reach. You can keep frequently used items like diaper cream and plastic wipe packs in a particular place.
Label each section for quick access, and store out-of-season items elsewhere, like in under-crib storage. Keep the changing station organized with a diaper caddy and ensure smaller items have specific spots in the dresser drawers.
Table of Contents
Newborns may be tiny, but they need a mountain of essentials. From onesies to bibs, socks to swaddle blankets, and don’t even get me started on the endless diaper stash. If you don’t have a system in place and an organized dresser then it will be difficult to find any essentials when in need. Those sleepless nights will become even more chaotic.
Trust me, I’ve been there, and it’s no picnic searching for a clean onesie at 2 a.m. Especially, when your little one is screaming their lungs out.
An organized dresser is a lifesaver for new parents. It will save you time, keep things tidy, and give you peace of mind. In this guide, I’ll share tips from my personal experience on how to organize a newborn dresser to make your life as a parent just a little easier.
Why Organizing a Newborn Dresser is Essential
New parents have to deal with a million things at once when they have a newborn. Diaper changes, feeding schedules, and soothing a crying baby can all feel like a full-time job. And if you Imagine trying to find a pair of tiny socks in a mess of baby clothes while your baby is wailing — not fun.
Here’s why an organized dresser is a must-have:
- Quick Access During Emergencies: Diaper blowouts don’t wait for anyone. A neatly sorted dresser means you’ll always know where things are. If you organize your newborn’s dresser neatly you’ll always know where things are. So, whenever you need a diaper or baby clothes you’ll find them easily.
- Keeps Things Clean: An organized drawer keeps baby clothes, diapers, and burp cloths clean. They stay at their place and don’t pile up into chaos.
- Helps Other Caregivers: If you label and categorize the drawers, it’ll make it easier for others to find essentials. My husband and I knew where we had to look for diapers or socks. Even once my mother came to take care of my baby when I was sick, and the labeled drawers helped her a lot.
- Reduces Stress: Parenthood is challenging enough. An organized dresser simplifies your daily routine, giving you more time to focus on your little one.
As the saying goes, “a stitch in time saves nine.” Investing time in organizing your baby’s dresser will pay off big in those early months.
Essentials to Gather Before Organizing
Before you start organizing your newborn’s nursery dresser you’ll need to gather some tools. That will make organizing smoother and more efficient. These little essentials will save you tie and sanity in the long run.
What you’ll need:
Drawer Dividers
Drawer dividers are game-changers. With drawer dividers you can create a dedicated space for tiny clothes, socks, mittens, and other smaller items. That will help you to find items that seem to disappear the moment you need them. Dividers also make it easier to keep things tidy and accessible, whether you’re organizing baby essentials in the top nursery dresser drawers or creating a system for future toddler years.
Labels
A label maker or even handwritten sticky notes can work well. Label each drawer or section clearly so everyone (including sleep-deprived parents and helpful grandparents) knows where to find items like diaper cream or burp cloths. Labels also make restocking essentials like extra diapers or plastic wipe packs a breeze.
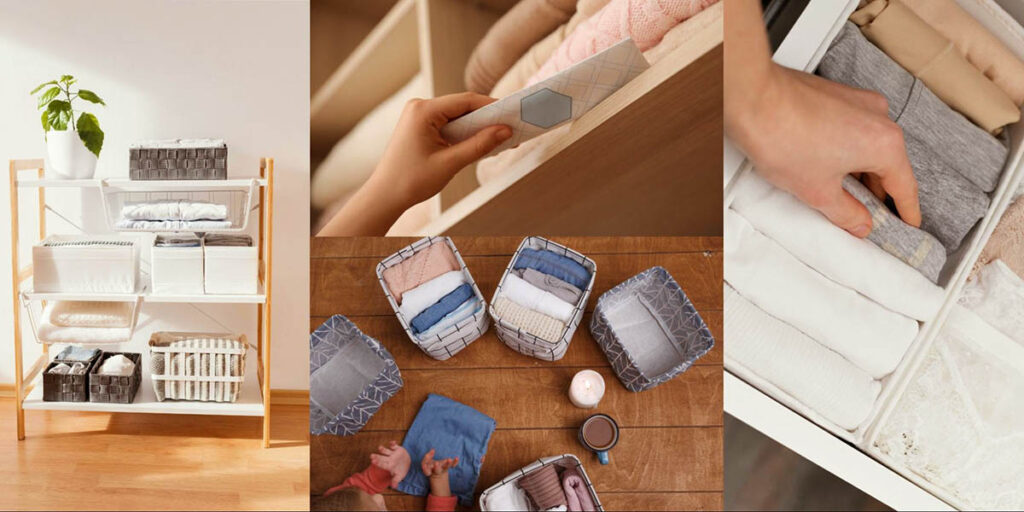
Storage Boxes or Bins
There are a few items like extra crib sheets, changing pad covers, or seasonal clothes you don’t use daily. Foldable bins or stackable storage are perfect solutions for them. Tuck them into a nursery closet or under the crib to free up valuable dresser space.
Sorting Baskets
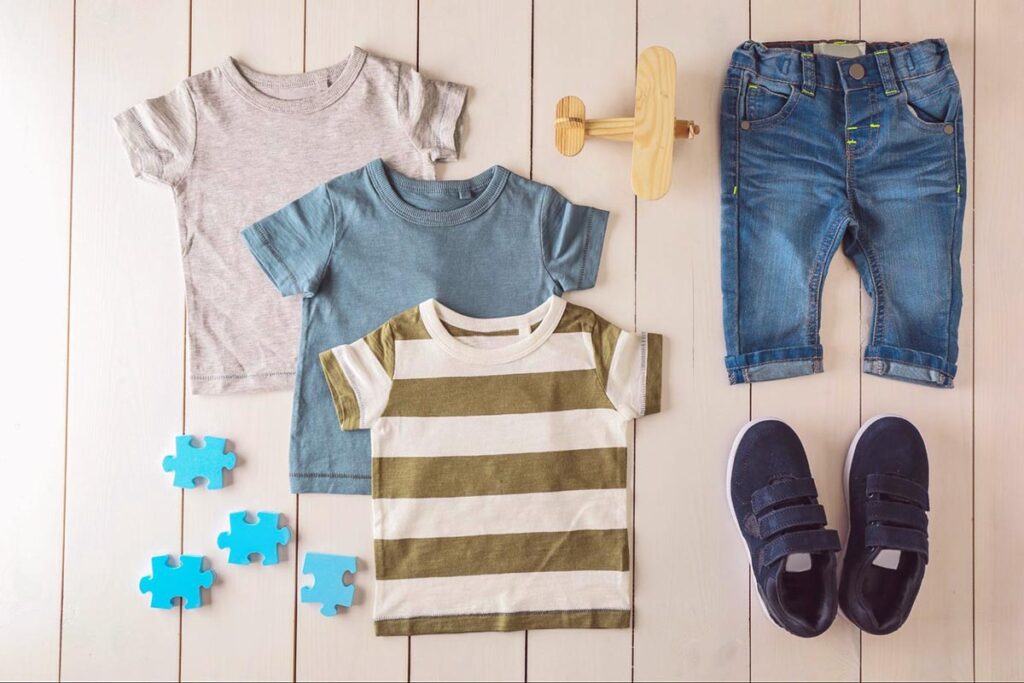
Baskets are incredibly helpful during the organizing process. Use them to separate baby clothes by size (newborn, 0–3 months, and 3–6 months) or by type (short-sleeved onesies, long-sleeved sleepers, etc.). This step makes it easy to transfer everything into the right dresser drawers without creating chaos.
Personalized Labels and Expandable Drawer Dividers
If you want an extra touch convenience then you can have your personalized labels and adjustable drawer dividers. It’ll be simpler to adapt your organization system as your baby’s dresser needs evolve. Because babies grow faster than weeds.
By having these tools on hand, you’ll be ready to set up an efficient system that keeps your baby’s nursery running like clockwork. Plus, it’ll make those middle-of-the-night diaper changes just a little less stressful.
Best Way to Organize Newborn Clothes: Step-by-Step
Step 1
Empty and Clean the Dresser
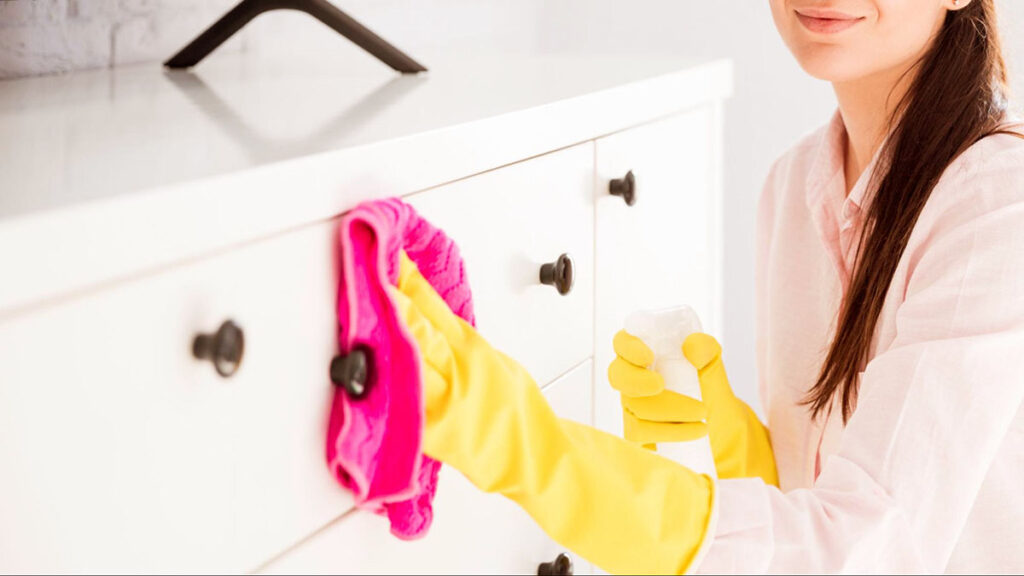
Start with a clean slate. Remove everything from the dresser and wipe down the drawers. Use a gentle, baby-safe cleaner to keep things fresh. A clean dresser is the perfect foundation for your organizing efforts.
Step 2
Categorize Items
Lay all the baby items out and group them by category. For example:
- Onesies and rompers
- Sleepwear (e.g., footed pajamas)
- Socks, mittens, and hats
- Burp cloths and bibs
- Diapers and wipes
- Seasonal or larger-sized clothes
| Pro tip: Keep daily essentials separate from rarely used items. This makes it easier to grab what you need without digging through everything. |
Step 3
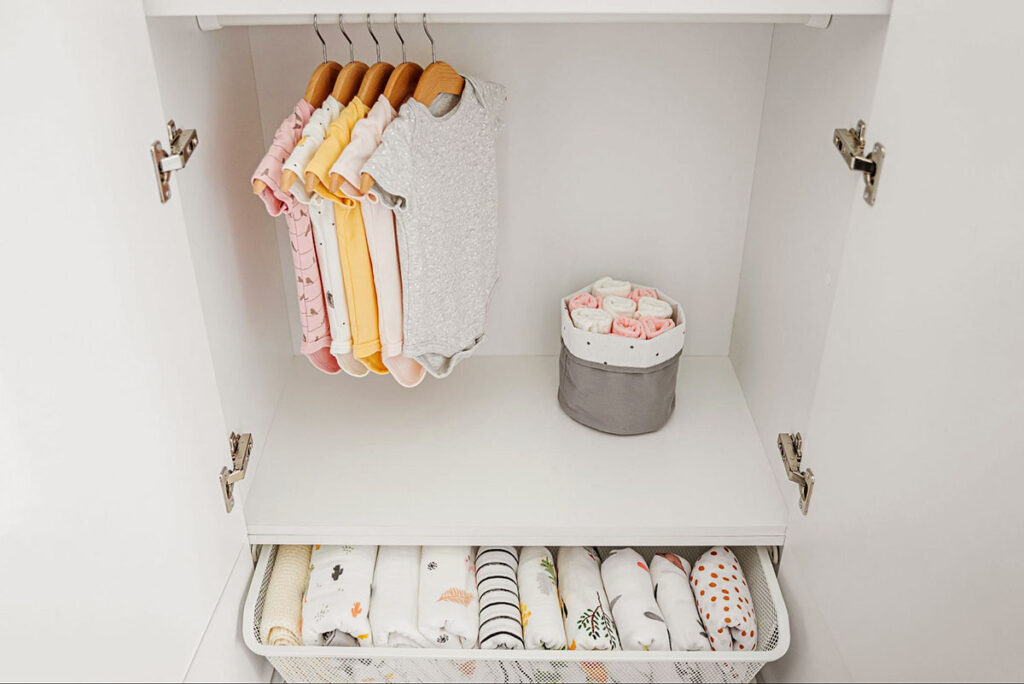
Assign Specific Drawers for Each Category
A well-thought-out system is key. Here’s how to divide the drawers:
- Top Drawers: Everyday essentials like diapers, wipes, and onesies. These are items you’ll reach for multiple times a day.
- Middle Drawers: Sleepwear, burp cloths, and bibs. These items are used regularly but not as frequently as diapers.
- Bottom Drawers: Seasonal clothes, larger-sized outfits, and extra crib sheets. These are items you won’t need every day.
Think of it as setting up a kitchen—keep the “utensils” you use most in arm’s reach.
Step 4
Use Organizers for Small Items
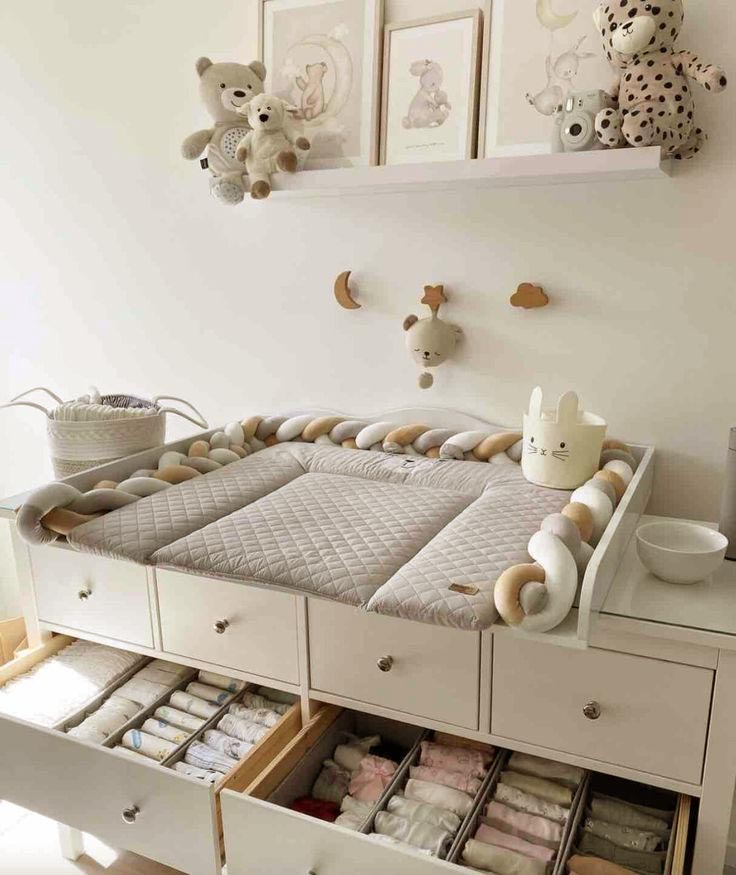
Tiny clothes are adorable, but they can easily disappear into clutter. Use expandable drawer dividers to separate smaller items like socks, mittens, and hats. This prevents everything from becoming a jumbled mess.
Step 5
Label Everything
Labels are your best friend. Use them to mark each drawer or section clearly. For example:
- “Diapers and Wipes”
- “Newborn Onesies”
- “Burp Cloths and Swaddles”
This step makes it easier for you and anyone else who might be helping out in the nursery.
Step 6
Rotate Clothes Regularly
Babies grow fast—like, really fast! Make it a habit to check the dresser every couple of weeks. Remove outgrown clothes and replace them with the next size up. This ensures you’re not scrambling for a larger onesie when you need it most.
Nursery Dresser Organization Tips: Maximizing Space
When I organized my baby’s dresser, some of the tricks worked for me. Here are some organizing tips:
Organize Clothes by Size and Type
I organized my baby’s clothes in categories by size and type. And this organizing idea made life so much easier. I grouped similar items like onesies, pajamas, and socks together, and used labeled dividers to separate them by size. You can also apply this tip. This way, you’ll always know where to find exactly what you need. Whether it’s for diaper changes, bedtime, or outings, you can easily grab what you need. It’s a simple system that saves time and also keeps the nursery dresser neat.
Roll Instead of Fold
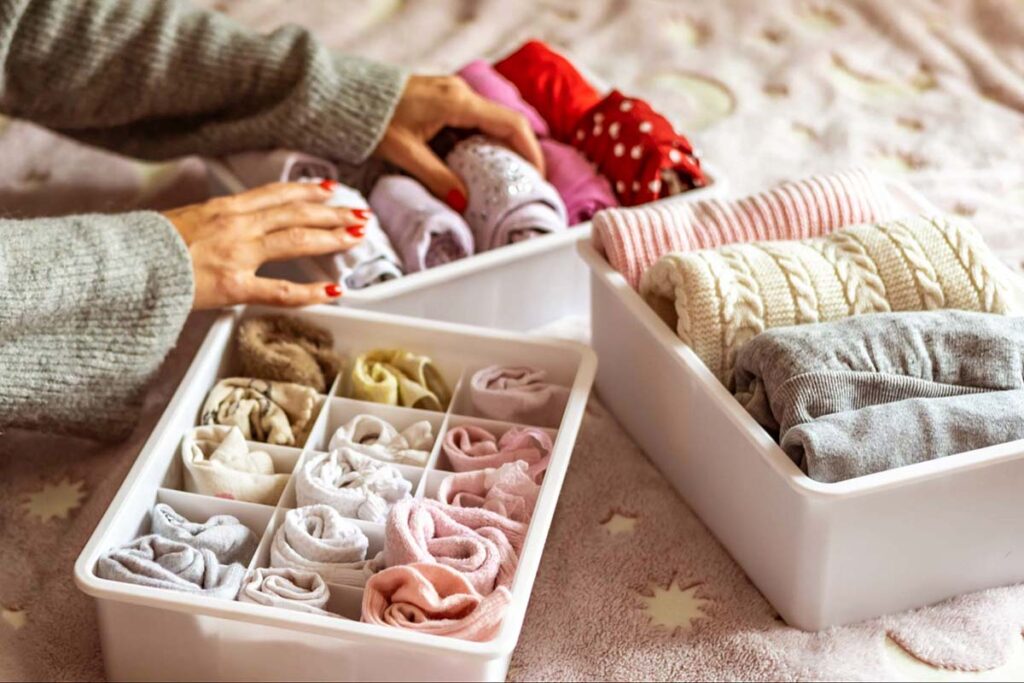
I rolled my baby’s clothes instead of folding them, and it saved so much space. Plus, it made it easier to see everything in the dresser drawers. Onesies, tiny leggings, and pajamas fit neatly, and I didn’t have to dig around to find what I needed.
Use Vertical Dividers
I added expandable drawer dividers to the nursery dresser, and they were a game-changer. They created dedicated spaces for things like burp cloths, socks, and plastic wipe packs. It kept all the smaller items organized, so I never had to waste time searching for them.
Store Off-Season Clothes Elsewhere
I kept the dresser drawers reserved for clothes my baby was wearing at the time. I put off-season outfits, like warm jackets or summer dresses into a storage bin under the crib. Sometimes, I used the nursery closet. I could easily grab what I needed without sorting through unnecessary items.
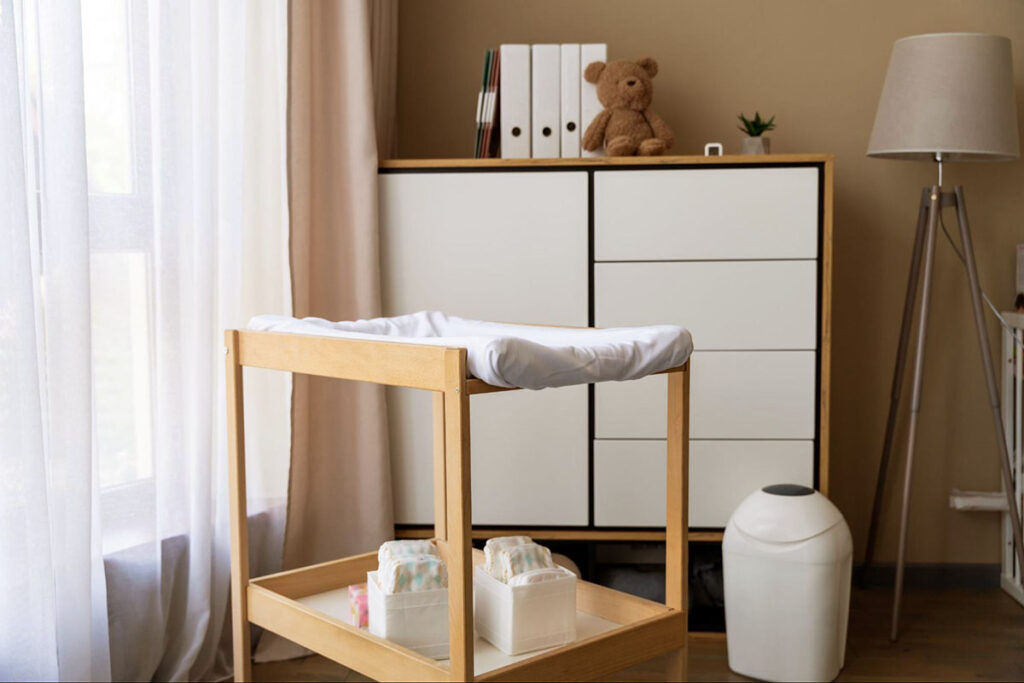
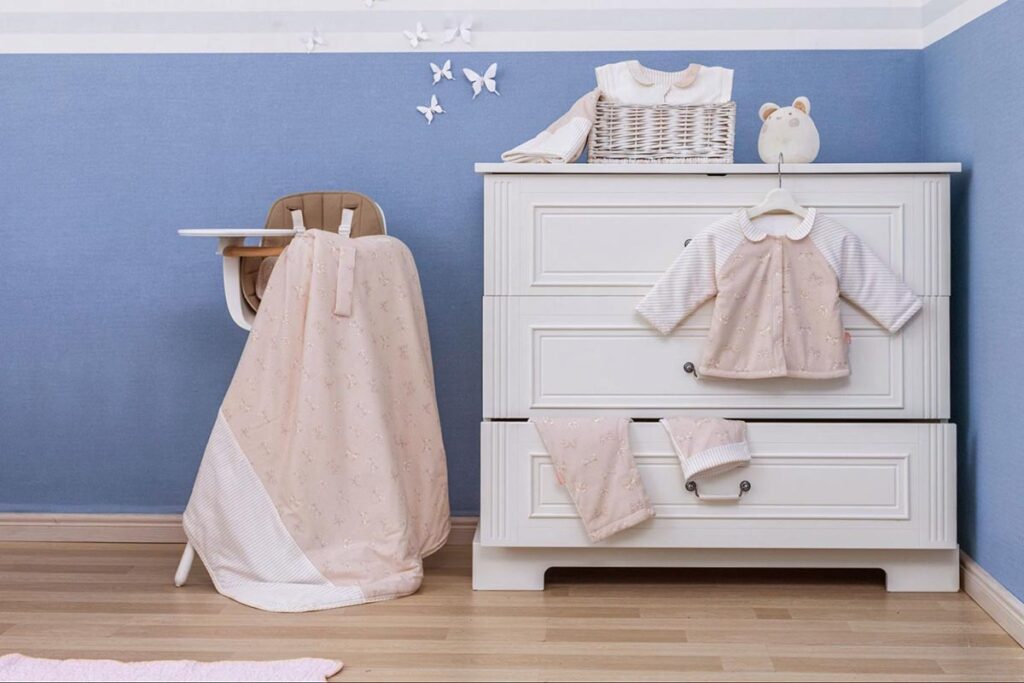
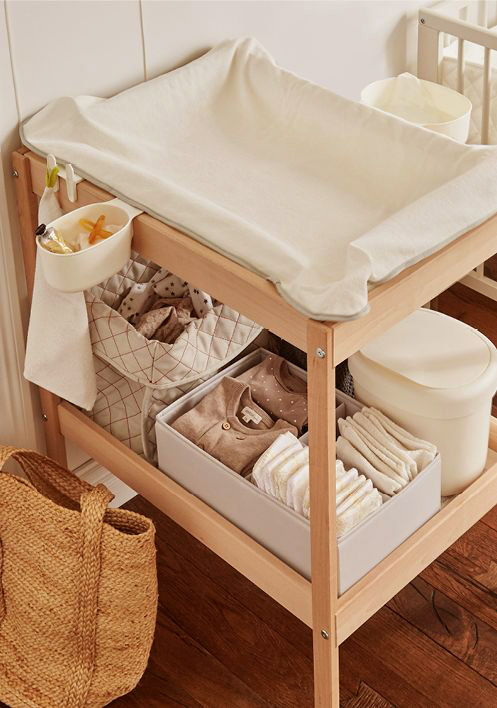
Create a Changing Station
The top drawer of the dresser became my go-to changing station. I filled it with diapers, diaper cream, and grooming essentials. Having everything within arm’s reach was a lifesaver during messy diaper changes.
Use a Diaper Caddy
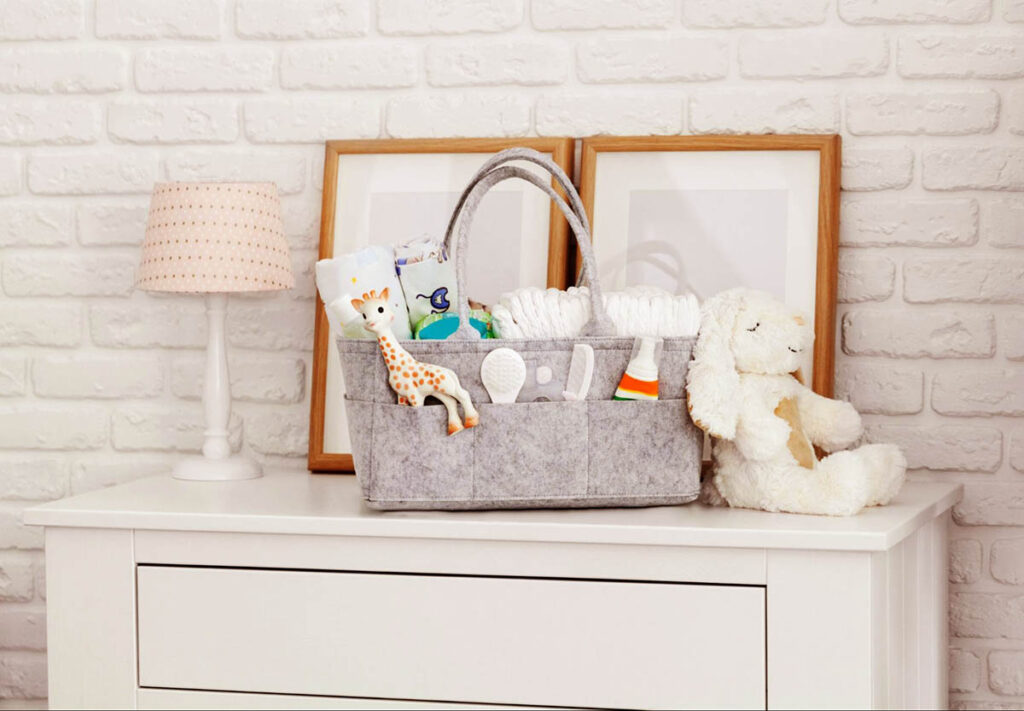
I also relied on a portable diaper caddy. It was always stocked with plastic wipe packs and diaper cream, so I could grab it and go to another room if needed. This freed up space in the dresser and made multitasking much easier.
Label Everything
I labeled each dresser drawer and storage bin with sticky notes or a label maker. It might have seemed a bit much, but it made a huge difference. Even if someone else was helping out—like my partner or a babysitter—they could easily find what they needed.
These tricks saved so much time and stress. Everything had a place, and daily routines. So, it felt smoother and more manageable. It really helped me focus on my baby instead of worrying about the clutter.
Maintaining an Organized Newborn Dresser
Once I had my system set up, keeping my baby’s dresser tidy turned out to be easier than I expected. Here’s what I did to stay on top of it:
Folded Laundry Immediately
I made it a habit to fold clean baby clothes right after they came out of the dryer. It wasn’t always easy to find the time, but putting them back into the dresser drawers right away kept things from piling up.
Decluttered Regularly
Every few weeks, I went through my baby’s dresser and pulled out outgrown clothes or anything that had seen better days. It felt good to make space for the things we actually needed, and I set aside a bin in the nursery closet for items to donate or store for later.
Stuck to the System
The organization system I set up was simple, and sticking to it saved me so much time. Every item had a dedicated space. Tiny clothes in labeled drawers, diapers and plastic wipe packs in the changing station, and extra diapers in a nearby bin. I made sure to return everything to its place after using it.
As the saying goes, “a place for everything and everything in its place.” Following this rule made life as a second-time mom so much more manageable. With an organized dresser, I could focus on my new baby without getting frustrated by clutter.
Related: How to Organizing Children’s Clothes: Step-by-step Guide
Additional Storage Solutions for Newborn Items
When I found my nursery dresser drawers starting to feel cramped, I had to get creative with extra storage. Here are a few solutions that worked wonders for me:
Over-the-Door Organizers
I used over-the-door organizers to store smaller items. I stored baby shoes, hats, and grooming essentials. It was an easy way to add extra space without taking up room in the dresser.
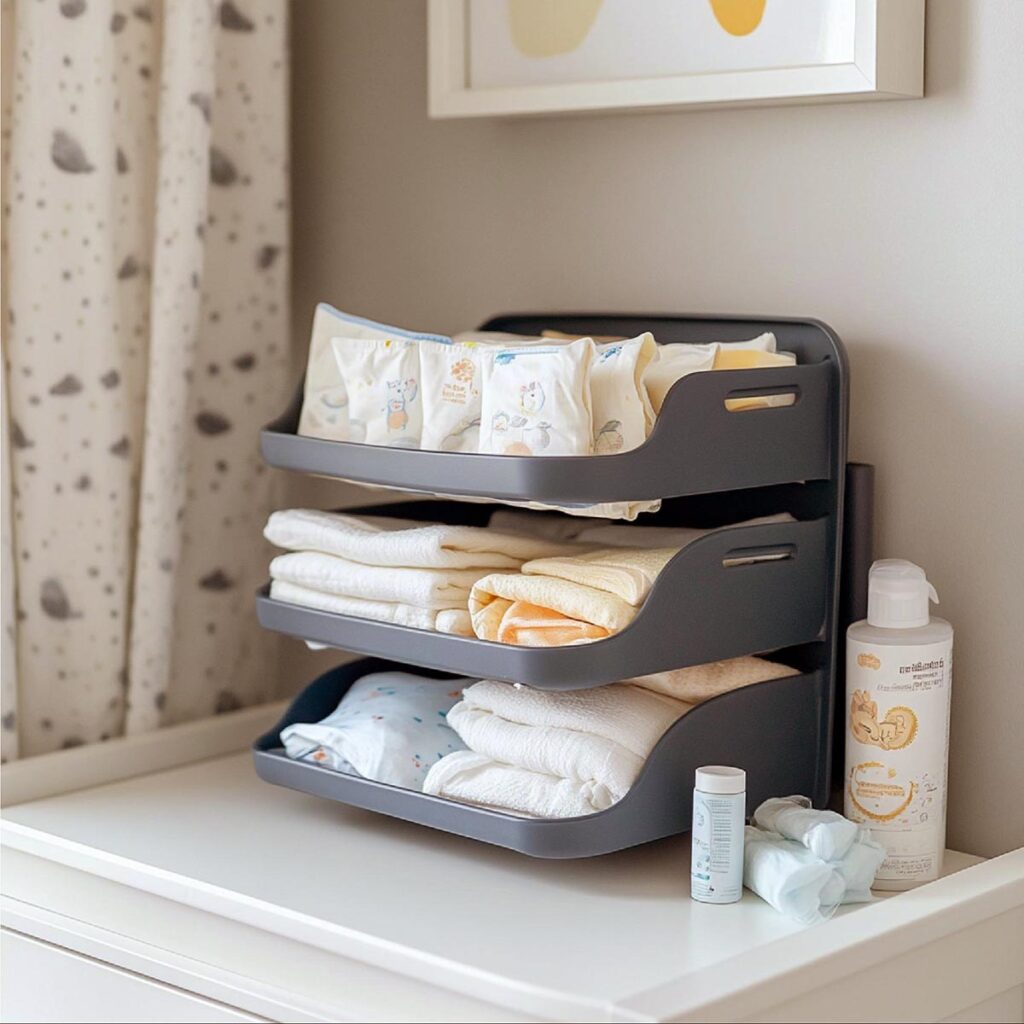
Baskets
Baskets became my best friend! I kept them near the changing station to hold frequently used items like diapers, diaper cream, and plastic wipe packs. It saved me from rummaging through drawers during diaper changes.
Under-Crib Storage
I kept flat storage bins under the crib. They were perfect for storing extra diapers, blankets, and even outgrown baby clothes. This gave me more room in the dresser for items my new baby used daily.
These small adjustments made a big difference in staying organized, especially as a second-time mom. Whether it was creating a dedicated space for everything or finding hidden storage options, I found ways to make the most of the nursery.
Changing Table Organization Ideas
When my dresser doubled as a changing station, I realized staying organized was key to managing diaper changes efficiently. Here are some ideas that worked for me:
Diaper Caddy
I used a diaper caddy to hold all the essentials—extra diapers, plastic wipe packs, and diaper cream. Having everything in one place made diaper changes much faster, especially during those late-night emergencies.
Wipe Dispenser
A wipe dispenser became my go-to for easy access. Whether it was a reusable case or the standard plastic wipe pack, it ensured I never had to fumble for wipes while handling my baby.
Dedicated Space for Grooming Essentials
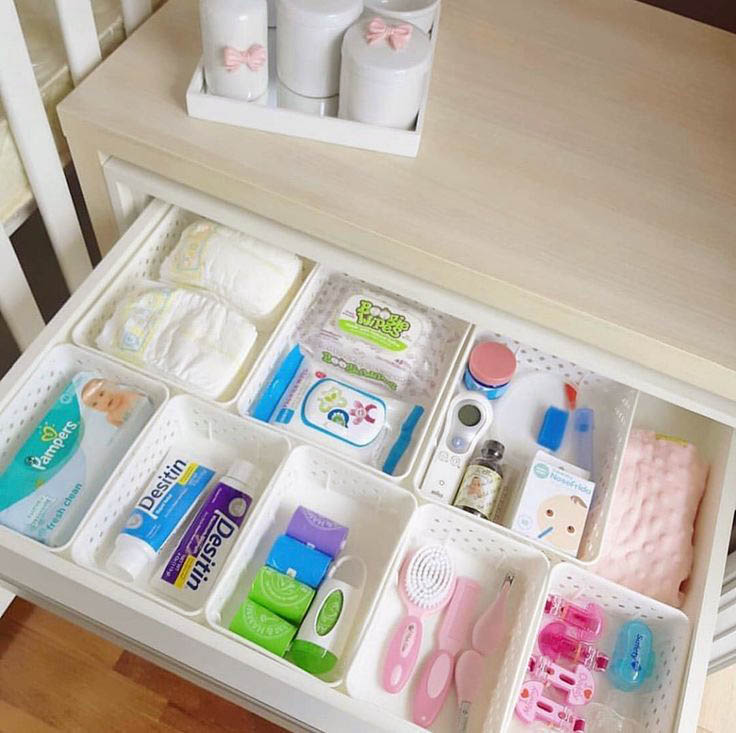
I carved out a small dedicated space in one of the dresser drawers for grooming items like nail clippers, a nasal aspirator, and a thermometer. It kept these smaller items within reach but neatly tucked away.
Frequently Asked Questions (FAQs)
Question: How to fold baby clothes in a dresser?
Answer: Fold baby clothes into small rectangles to save space. You can also roll items like onesies or pants and stack them upright. That’s how you can see everything at a glance.
Question: How to organize baby clothes by size?
Answer: You can separate clothes by size like, newborn size, 0-3 months size, or 3-6 months size. Then place them in different drawers or sections. Also, you can use labels or dividers. It’ll not mix the items and will keep them neat. You can easily grab them whenever needed.
Question: Can babies sleep in drawers?
Answer: Babies should not sleep in drawers. It’s not safe for them to sleep in drawers. They need a proper crib or bassinet with a firm mattress and no loose bedding.
Question: How many outfits do babies really need?
Answer: Babies need about 7-10 outfits per size. They spit up or have diaper leaks often, so extras are helpful.
Question: Is 0-3 months the same as 3 months?
Answer: No, 0-3 months covers newborn to three months, while “3 months” usually fits a slightly bigger baby who’s closer to three months old. Check size labels carefully.
Conclusion
An organized newborn dresser made life so much easier for me. I was juggling everything with a new baby at the time. It’s all about creating a system that works for you. Keeping everything you need within arm’s reach is key.
I assure you, when you follow these simple steps, you’ll save so much time. You’ll also be stress free. It also gives you more precious moments to enjoy with your little one.
Do you have any tips or tricks that worked for you? Want to share more on how to organize a newborn dresser? Share in the comments below. I’d love to hear them.